DIY "To Do" List
Centerpieces--DONE
Veil
Bridesmaid gifts - DONE
Aisle Decoration (pews)--DONE
Bouquets (bride + 4 bridemaids)--in progress
4 Bouts--in progress
Date Frame (bride and groom table)--DONE
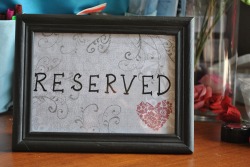
Reserved Seating Sign--DONE
Toasting Flukes (decorate)--DONE
Card Box
Guestbook
Garter
Wedding Cake
Favors--just need candy
Bridal Jewelry- DONE
.......................
Veil
Bridesmaid gifts - DONE
Aisle Decoration (pews)--DONE
Bouquets (bride + 4 bridemaids)--in progress
4 Bouts--in progress
Date Frame (bride and groom table)--DONE
Reserved Seating Sign--DONE
Toasting Flukes (decorate)--DONE
Card Box
Guestbook
Garter
Wedding Cake
Favors--just need candy
Bridal Jewelry- DONE
.......................
Bridesmaid Gifts--Pearl Necklaces
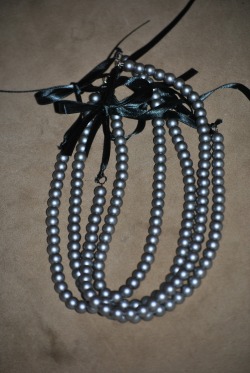
I made these as gifts for my Bridesmaids to wear with their dresses. Their dresses are going to be the "little black dress", but I wanted to finish off the look with that classic romance, pearls. I decided to use silver pearls since that will be our accent color. These were very easy to make thanks to birdcagebride. There are 4 in all.
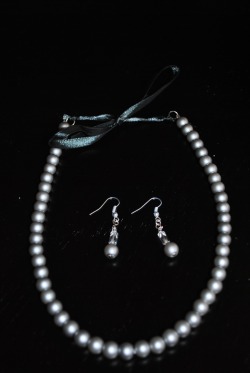
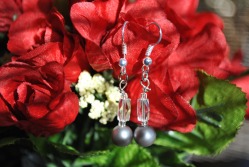
Bridal Jewelry
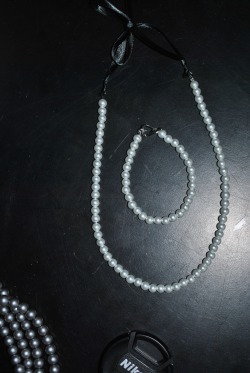
I used the same concept as the Bridesmaids necklaces, accept I want the classic white pearls. I already had some earrings that I had bought but never wore that have pearls and crystals, so they'll match perfectly, but add a little bling. I had enough pearls left over to make a bracelet too! I was so excited when I finished these and tried them on :) I think they're perfect!
Aisle Decor
Pew Cones. I've seen these everywhere on the knot, and I love the simplicity of them. I will have 12 in all. I decided to go with a simple black cone and sparkly silver ribbon. I might add a silver or white monogram to each cone just for an extra pop.
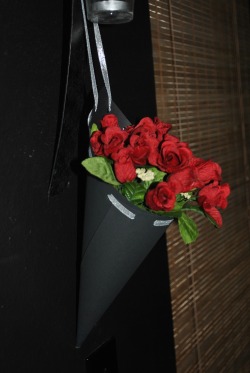
Reception Centerpiece
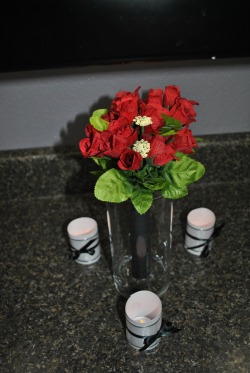
When I was trying to come up with our centerpieces I immediately went for the romantic in me and wanted something with roses and candles. *sigh* ...but our venue doesn't allow open flames of any kind (so sad!!!)...the venue was more than perfect, in the right location, and for the right price, so a compromise had to be made. LED tealights. With this in mind, I also needed a way to disguise the tealights since they're not exceptionally attractive with their plastic-y flame. I found a picture online that had a tall cylinder vase and 6 small votives with a demask design on the glass, allowing the perfect desguise for the tealights yet still proved the right ambience. They were stunning, simple, but elegant. However, after researching these vases and votives, the cost was outrageous for our small budget. Off to DIY to the extreme. I was originally going to buy the glass vases and votives, then wrap them in a patterned vellum to allow the same concept as the already decorated ones. But again, I'm thinking cost. SOOO...I pulled out my paper and ribbon and went to work. This is what I came up with. The white paper allows the glow and ambience just fine. The silver ribbon provides the base for our color scheme and the black ribbon brings it all together. The flowers will be reused from the ceremony decor, and the stems will be wrapped in a pretty, shiny, black ribbon. The tables will be covered in black so the contrast will be perfect with the overhead lights dimmed. I'm love how they turned out!!! Off to make the rest...
Date Frame

This will be displayed on our reception table and then later hung in our house!
Bridal Bouquet
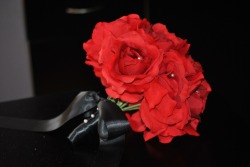
Yes, Real flowers are always delightfully pretty and smell amazing...however...I am a BUDGET bride...and a practical one too! REAL FLOWERS DIE...FAST! This bouquet will last me a lifetime! This is not the finished product, but merely a trial and sample, which I ADORE!!! I found some beautiful full red roses at walmart. A couple hours, few mishaps, errors, and redo's later I came up with this bouquet. It's definitely what I was going for. I'll practice a few more times, but I am hoping to complete my bouquet and 4 bridesmaid bouquets!
Toasting Flutes
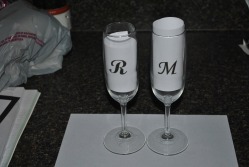
These toasting flutes were super easy and fun to make. I bought the flutes for $1.99 each at World Market. Then I printed out the Monogram for our first initials in the font I liked best. I tucked the paper into the glasses, then traced the monogram with a paint pen. Took about 15 minutes. I thought about adding some ribbon or a charm to the bottom...but we're very simple people, and the ribbon almost seems cheesy. I plan on keeping these and using them on our anniversaries!!! (I don't remember which knottie did this so I apologize for not giving you due credit, but thanks for the idea!!!)
Bouts
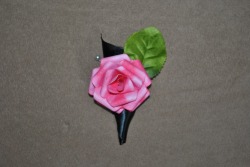
After much debate I decide to attempt my own bouts! However...I was not very fond of the fake flowers. They look good all clumped together in my bouquet, but it is quite difficult to find an individual, full blossom! SOOO...instead, I decided to go even more unconventional! I found this fun tutorial for paper roses on offbeatbride.com. I fell in love with these simple whimsical flowers and was trying to find some way to incorporate them into my wedding. Then I had an AH-HA moment! The BOUTS! This is what I came up with. The rose started out as white paper, then I dabbed a red ink pad over it several times. After making the rose, I twisted some black ribbon around until I got the right design, hot glued it and the flower together, then I hot glues some greenery I had lying around from the bouquet I made. I think it turned out great! They're unique and they'll live FOREVER! I love the playfulness of them! And they were soooo easy to make.
Reserved Sign